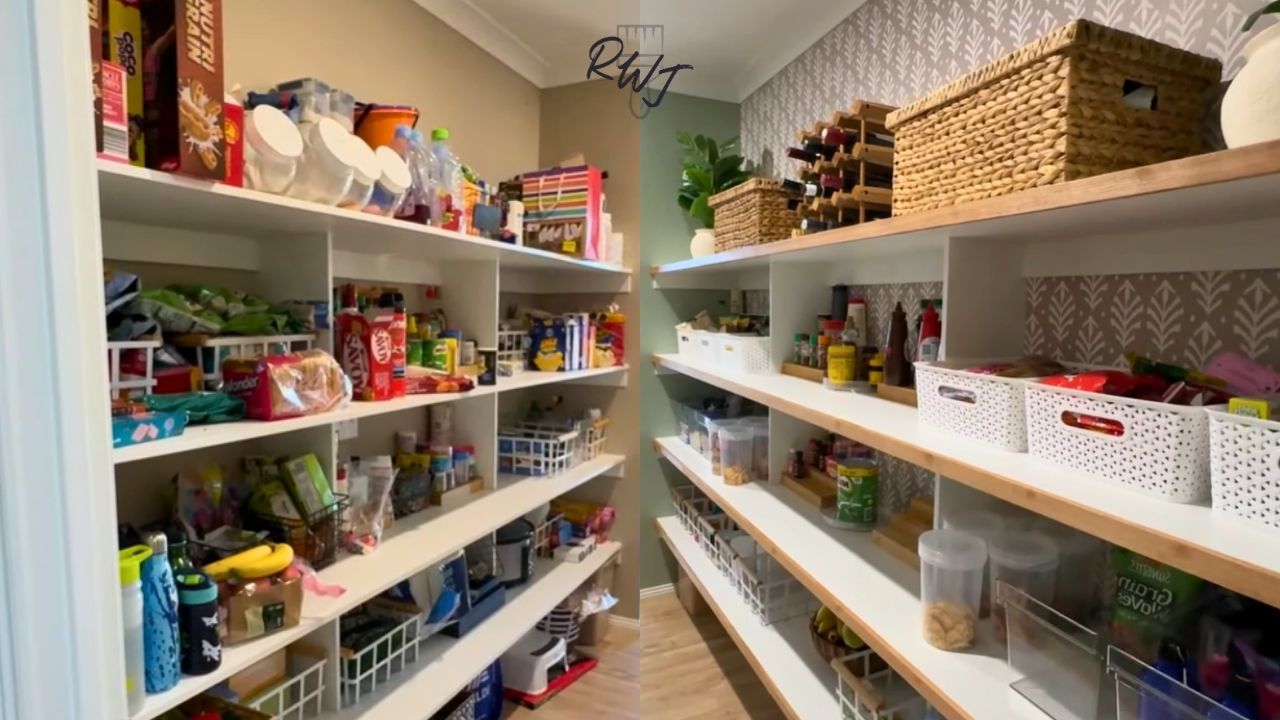
Pantry Transformation: A Stylish and Functional Makeover
I’m so excited to share my pantry makeover with you.
I’m Jade, and I'm here to help you create a home you love on a budget.
In this blog post, I'll guide you through transforming a cluttered pantry into a stylish and functional space. We'll cover each step of the process, and I’ll share essential tips for organisation, and discuss the benefits of a well-organised pantry.
Below is also a list of the products I used in the makeover in case you want to purchase the same ones:-
- Wallpaper - https://bit.ly/4csdHk7
- Black Paint - Monument - https://bit.ly/4c6RcRq
- Green Paint - Slender Pine - https://bit.ly/3Xc5f3J
- Tasmanian Oak Timber - https://bit.ly/3VfhOZv
- Wallpaper Glue - https://bit.ly/3VbI0nR
- Wallpaper Application Kit - https://amzn.to/4ci8aNm
- White Plastic Basket - https://bit.ly/3wWWPmr
- Clear Plastic Containers - https://www.bunnings.com.au/boxsweden...
- Clear Circle Containers - https://www.kmart.com.au/product/2l-r...
- Macrame Hanger - https://bit.ly/3VfEdG3
- Small Pot - https://bit.ly/3VtbhvE
*Some of the above links may be affiliate links. If you purchase a product through the affiliate links it will not cost you any extra but it will really help me to continue to provide you with great content. I appreciate your support.
The Before: A Cluttered Space
I’m fortunate to have a large pantry space, but it was a mess of clutter with minimal organisation. I wanted to create a dramatic impact with both style and functionality. Here’s how I did it!

Step 1: Clear and Clean
First, I removed everything from the pantry and gave it a deep clean. Dust accumulates on shelves and baskets, so a thorough cleaning is essential. I also vacuumed the floor and cleaned the walls to ensure the paint would stick properly.

Step 2: Applying Wallpaper
To add a stylish touch, I decided to apply a stunning wallpaper. Here’s the process:

1. Mix Wallpaper Paste: Add water to the paste, stir well, let it sit for 3 minutes, and stir again to ensure there are no chunks.

2. Install the First Piece: The first piece of wallpaper must be level, as it sets the stage for the rest. I used a laser level for precision. If you don’t have one, a measuring tape and marked lines will work.

3. Work Around Shelves: With numerous shelves, I carefully cut the wallpaper to fit around them. For beginners who have never done any wallpapering before I recommend you start with a straight wall to practice.

4. Continue the Process: Install the wallpaper row by row along the wall from top to bottom, ensuring the pattern matches up.

Step 3: Painting the Walls
Next, I chose two bold colours: a light sage green called Slender Pine and a nearly black colour called Monument. Here’s how I applied them:

1. Paint with a Brush and Roller: I painted the two ends and one wall green using a brush for intricate areas and a mini roller for broader sections.

2. Apply the First Coat: I cut in around the corners and cabinetry, then applied the first coat of paint.

3. Apply the Second Coat: After the required drying time, I applied the second coat for a complete finish.

Step 4: Adding Timber Frames to Shelves
To enhance the look of my laminate shelves, I added beautiful hardwood timber frames. Here’s the process:

1. Cut Timber to Size: I used a drop saw to cut Tasmanian Oak timber to fit the shelves.

2. Attach Timber Frames: Apply Liquid Nails to the shelf fronts, place the timber, and secure it with a nail gun.

3. Fill Nail Holes: Use wood filler to fill nail holes, let it dry, and sand it down.

4. Apply Clear Varnish: Apply an oil-based polyurethane for durability and easy cleaning, allowing 8 hours of drying time between coats. I applied three coats in total.

With the renovations complete, my pantry is now ready for organisation. The wallpaper, paint, and timber frames transformed the space into a stylish and functional area. But before I got to organising, I wanted to show you the complete makeover.

Now It’s time to organise. I purchased a whole lot of different style and size containers from Bunnings. I worked out how many of each I would need and then put them into the space. Once I was happy with the look and layout of the pantry, I then started to put all of my food back in. I was surprise how much more spacious it seamed and how it changed my emotions having such an organised space. Let’s have a look at 5 reasons why you should organise your pantry.

1. Saves Time: Quickly find what you need and save time during meal prep and grocery shopping.

2. Reduces Food Waste: Easily see what you have, preventing duplicate purchases and expired items.

3. Improves Kitchen Efficiency: A well-organised pantry makes cooking and baking more efficient and enjoyable.

4. Enhances Aesthetic Appeal: An organised pantry looks attractive and is more enjoyable to use.

5. Promotes Healthy Eating: With healthy foods more visible and accessible, you’re encouraged to make healthier choices.

This pantry makeover was a rewarding project that not only improved the functionality of my kitchen but also added a touch of style. If you want to watch how I completed the maker and get some more tips you can check out the video tutorial below:
I hope this makeover inspires you to transform your pantry into a space you love. Happy organising!
Do You Want To Hang Out With Us On A Regular Basis?
Don't miss out on your dose of DIY and furniture painting inspiration each week.
As a member of our family you will get hand delivered DIY, furniture flipping, crafting and home inspiration weekly along with tips to help you make more money as a furniture artist (if that is your cup of tea).
Sign up now. You know you want to. 😉


