Balinese Coffee Table Transformation: A Drab to Fab DIY Furniture Makeover
In this article, I’m going to walk you through the steps of how I took an old damaged Balinese-style coffee table and gave it a stunning makeover that'll leave you amazed.
Step 1: Varnish Removal
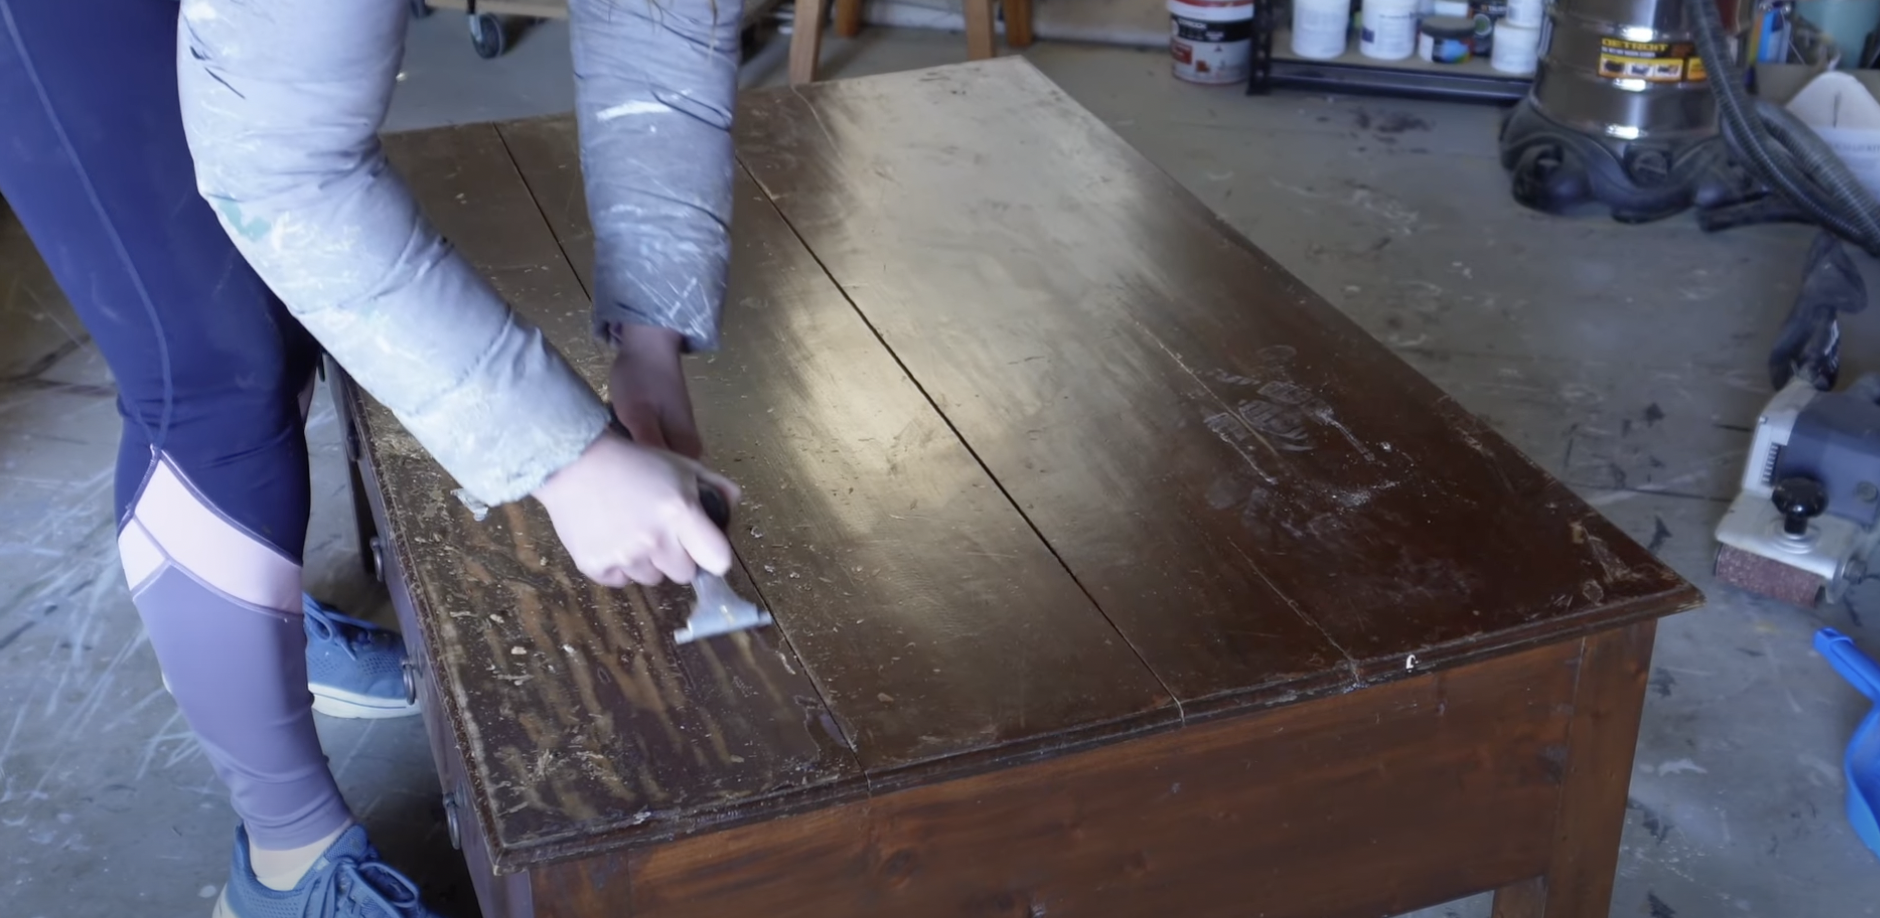
The first step in our furniture transformation was to remove the old varnish from the coffee table's surface. We opted to use a carbide scraper for this task.


Scraping off the varnish not only prepared the table for the upcoming steps but also offered a strangely satisfying and quick experience.

It's important to focus on one section at a time and ensure that you've removed all traces of the varnish.
Step 2: Sanding
With the varnish gone, it was time to smooth out the wood's surface.

While the carbide scraper had saved us some time, we proceeded to use 80-grit sandpaper to ensure that the table had an even and polished texture.


Later, we switched to a finer 120-grit sandpaper to achieve a smoother finish. Sanding is a crucial step that lays the foundation for a flawless final look. Be sure to sand with the grain and pay special attention to any grooves or cracks.
Step 3: Filling Cracks
During the process, we encountered some deep cracks in the wood.

To address these imperfections, we used a wood filler mixed with sanding dust. This combination not only filled the cracks but also allowed us to match the filler's colour closely to that of the timber. A smooth, even surface is essential for achieving the desired look.
Step 4: Removing Hardware
We decided to give the coffee table a modern update, and one of the first steps in doing so was to remove the old hardware.

Outdated or unappealing hardware can detract from a piece's overall aesthetic. Removing them provides a fresh canvas to work with and allows you to choose hardware that complements your new design.
Step 5: Sanding Drawers and Legs
For a unique touch, we chose to expose the raw timber on the drawers and legs of the coffee table.


This step added character and contrast to the finished piece. While sanding these areas, it's crucial to maintain a flat surface and pay attention to detail.
Step 6: Cleaning
Proper cleaning is often overlooked but is a critical step before painting.


We used a degreaser to remove any residues and ensure that the paint adhered correctly. This step is essential for achieving a professional-looking finish.
Step 7: Primer
To block any red undertones from the previous stain and prepare the surface for paint, we applied a red shellac primer.

Priming is a vital step to ensure proper colour coverage and durability.
Step 8: Painting
We selected a beautiful sage green colour for the coffee table.


Painting may seem straightforward, but it's essential to apply even coats and allow each layer to dry before proceeding. The paint is what will give your piece its new identity, so choose your colours carefully.
Step 9: Whitewashing
For a lighter timber appearance and added charm, we opted for a whitewash finish. This involved creating a paint and water mixture, applying it, and then wiping off the excess.


 Whitewashing provides a rustic and unique look that can transform the overall appearance of your piece. I’m not a big fan of the orange tones in most timber so whitewashing is a great way to change the tone of the timber.
Step 10: Staining
Alternatively, if you prefer a different timber tone, staining is a viable option. Stain can enhance the wood's natural beauty while allowing you to achieve your desired colour.
Step 11: Top Coat
To protect the finish and add durability, we applied a clear water-based polycrylic top coat.

This step ensures that your refurbished furniture piece can withstand everyday use without losing its charm.
Step 12: Hardware Upgrade
To complete the makeover, we replaced the old hardware with stunning gold mandala knobs. New hardware can instantly elevate the appearance of your piece, giving it a fresh and modern touch.

And there you have it! This coffee table underwent an incredible transformation, from drab to fab. The colours blend beautifully, and the unique design elements make it a one-of-a-kind piece.
Watch my video tutorial to learn more:
If you want to be continually inspired, make sure you sign up for our newsletter below for weekly BLOGs & Video tutorials on all things DIY & Painted Furniture.
Do You Want To Hang Out With Us On A Regular Basis?
Don't miss out on your dose of DIY and furniture painting inspiration each week.
As a member of our family you will get hand delivered DIY, furniture flipping, crafting and home inspiration weekly along with tips to help you make more money as a furniture artist (if that is your cup of tea).
Sign up now. You know you want to. 😉


