

A Bedside Table Makeover: It doesn’t have to be perfect the first time.
Today we're diving into the step-by-step process of transforming ordinary bedside tables into stylish pieces.
However I don’t just refinish these one time, I end up refinishing them in three different ways. I did this because I wanted to keep going until I got to an end result that I was happy with. So let’s take a look at the three different processes that led to a final result I'm thrilled with.
Before we begin, let's briefly check out the tools and materials I used for this project.
-150mm Orbital Sander - https://amzn.to/48AZ381 (Amazon)
-125mm Battery Orbital Sander - https://amzn.to/3tsws67 (Amazon)
- 125mm Sanding Disks All Grits https://amzn.to/3ujtYHx
- 150mm Sanding Disks All Grits https://amzn.to/3HIMJXQ(Amazon)
- Makita Battery - https://amzn.to/48rUygc (Amazon)
- Hand Sand Paper - https://amzn.to/48gP3Rt (Amazon)
- Tricleanium Degreaser - https://amzn.to/3ufNl47 (Amazon)
- Spray Gun Wagner Flexico - https://amzn.to/47Z8T2V (Amazon)
-Mini Roller Head 4mm Nap - https://amzn.to/3Oq8Hmk (Amazon)
- Paint Brush - https://amzn.to/3HHDXcE (Amazon)
- Primer - Zinsser Bin Shellac Primer - https://amzn.to/42lC7rq (Amazon)
- Black Paint - Pureco Carbon Mineral Paint from https://lebellemaison.com/
- All Natural Timber Stain - https://www.caprioleshabbychic.com.au...
- Top Coat - Pureco Topcoat available from https://lebellemaison.com/✨
*Some of the above links may be affiliate links. If you purchase a product through the affiliate links it will not cost you any extra but it will really help us out to continue to provide you with great content. We appreciate your support.
Let's get started!
- Step 1: Assessing the Bedside Tables Before diving into the makeover process, let's take a look at the condition of the bedside tables.


These tables had scratches and damage, indicating the need for a significant makeover. The goal was to bring them back to life and provide a fresh opportunity for a new look.
- Step 2: Stripping Away the Old Varnish To begin the transformation, I used a belt sander to quickly remove the old varnish and address deep scratches.


The belt sander efficiently took care of this step, making the process fast and effective. Despite the potential intimidation for beginners, a belt sander is a simple tool to master with practice.
- Step 3: Orbital Sanding for Smooth Surfaces Next, I employed an orbital sander with 80-grit sandpaper to remove any remaining varnish and grooves created by the belt sander.


This step ensured a smooth surface. The orbital sander also played a crucial role in preparing the base of each bedside table for a raw timber finish.
- Step 4: Scuff Sanding and Cleaning After removing the original hardware, I conducted a thorough scuff sanding of the whole piece using 120-grit sandpaper, preparing the surfaces for paint.


Cleaning the piece inside and out with a crystallised degreaser ensured a pristine canvas for the upcoming makeover.
- Step 5: Applying Primer Using a spray oil-based primer in a can, I primed the entire piece. I chose the spray can to prioritise quick application that required less cleanup than using an oil-based product in my spray gun.
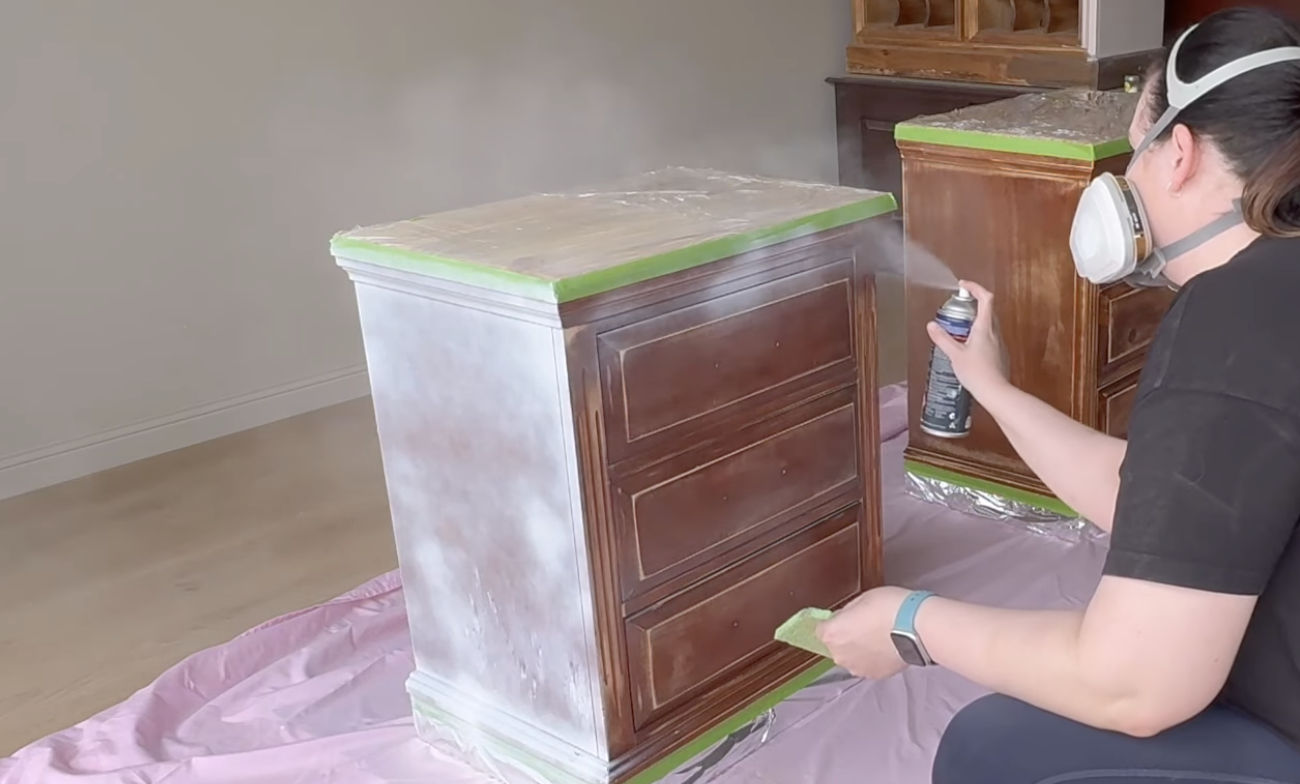

Choosing a high-quality primer is essential for ensuring durability in the final finish.
- Step 6: Filling Imperfections and Sanding After identifying imperfections post-primer, I applied the wood filler, allowing it to dry before sanding off the excess.


This step ensured a flawless foundation for the subsequent paint application.
- Step 7: Painting the Base Using black paint, I painted the entire piece, I used a paintbrush for the edges of the drawers and a spray gun for the rest.


The real-time demonstration emphasised the efficiency of using a spray gun for a smooth and uniform finish.
- Step 8: Staining the Timber To add warmth and contrast, I applied a gel stain in the colour 'all-natural' to the top and base of each bedside table.


The staining process involved meticulous application and wiping with a microfibre cloth to achieve a smooth consistency.
- Step 9: Top Coating Once the body was painted and the timber was stained it was time to apply a clear polycrylic topcoat to protect the whole piece.


Because I was using the same topcoat for the whole piece I was able to apply this with my spray gun for a quick flawless finish.
- Step 10: Creative Hardware Choices For the final touch, I experimented with different hardware options. Initially opting for leather pulls, I later changed direction, introducing gold-painted hexagons.


Unhappy with the outcome of the hexagons, I pivoted again, settling on a paintable wallpaper for the drawer fronts.
- Step 11: Wallpaper Application and Final Touches Cutting and gluing six pieces of paintable wallpaper to the drawer fronts, I applied two coats of black paint, maintaining consistency with the overall design.


I then applied a top coat with a paintbrush and sponge to ensure a uniform finish.
The journey from worn-out bedside tables to stylish pieces was a bit longer for these bedsides. I spent quite a little while on the different designs only to decide that I didn’t really like the end result and changed them again.
Despite facing challenges along the way, the final result, featuring paintable wallpaper and unique hardware, demonstrates the beauty of persistence in the creative process.
What are your thoughts on this makeover? Would you have stopped at the first or second option, or do you agree that the third time was the charm? If you would like to see this makeover as a video with all the fun visual effects you can check it out below!
Do You Want To Hang Out With Us On A Regular Basis?
Don't miss out on your dose of DIY and furniture painting inspiration each week.
As a member of our family you will get hand delivered DIY, furniture flipping, crafting and home inspiration weekly along with tips to help you make more money as a furniture artist (if that is your cup of tea).
Sign up now. You know you want to. 😉


